
Join us in creating a haven for nature lovers! The CTC is seeking volunteers to help build benches for our bluebird house project at Pelham Veterans Memorial Park. With the cost of supplies covered and a tested
bench design in hand, your craftsmanship will provide a cozy spot for birdwatchers to enjoy the beauty of our trails. The CTC anticipates building more benches, as we conduct trail assessments and find ways to
make trails friendlier for people of all ages and abilities. Be a part of something special – let’s build benches and foster a more inclusive outdoor experience together!
The entire bench is made of 2 x 10 material. You can use any species of wood to build this bench, but if you are intending it for outdoor use, I recommend a material that is resistant to decay, like Cedar, Redwood or Pressure Treated pine.
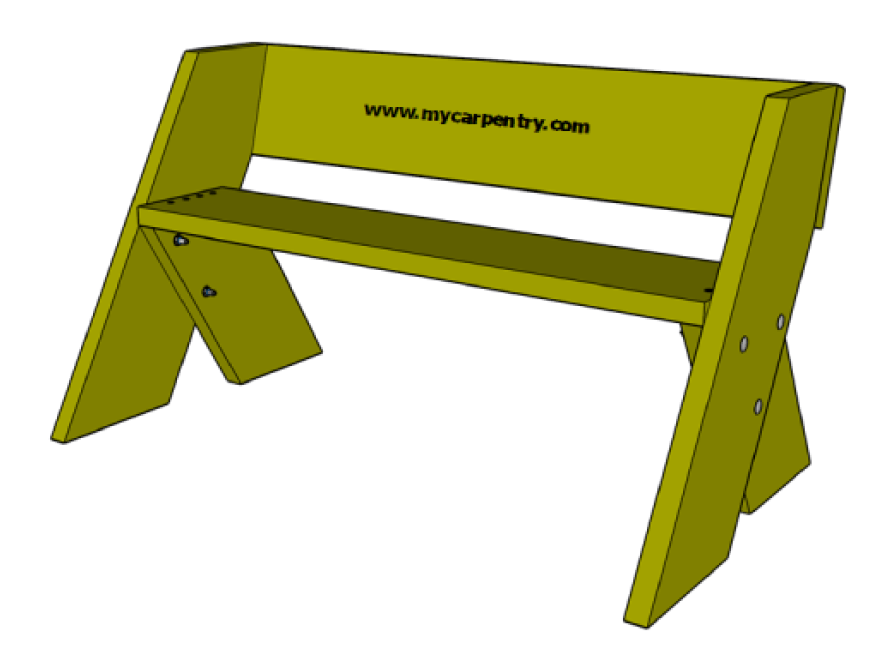
The complete Aldo Leopold bench can be built from two 2x10s (10 feet long) and a small amount of deck screws and carriage bolts.
Here’s the complete list:
Two 2x10s @ 10 feet
Six 3/8 inch diameter carriage bolts @ 3.5 inches (plus one washer and one nut for each)
Sixteen-twenty 3-inch wood screws
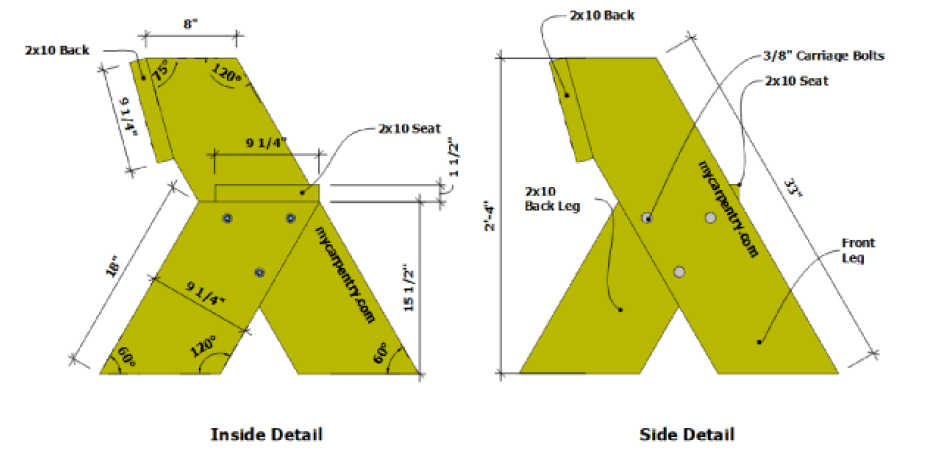
With a speed-square or similar tool, mark a 30 degree angle near the end of one of the 2x10s (this will result in a 60 degree angle on the 2×10). Cut it with a circular saw. Measure along the edge of the 2×10, 33 inches from the long point of the first angle and mark another 30 degree angle. This angle should be parallel to the first angle. Cut it and use it as a template for the other leg. These are the front legs of the bench. (see side view diagrams). Measure 8 inches from the top end of one of the front legs and mark a 15 degree angle (this leaves a 75 degree angle on the back support/front leg). Cut it with your circular saw. This is the angle of the back rest (see side view diagram). Repeat this procedure on the other front leg. From the same piece of 2×10, measure 18 inches from the long point of the last 30 degree angle that was cut from it. Mark another 30 degree angle and cut. This is the back leg support. Use it as a template for the other back leg. On one of the uprights, measure 18 inches from the long point and make a 30 degree mark parallel to the top and bottom cuts. This is the position of the back leg support. (See side view diagram) Align the front support and back leg support as shown in the diagram and temporarily secure the two pieces together with ‘C’ clamps. Mark the holes for the carriage bolts by measuring 1.5 inches from the edge of all overlapping surfaces, forming a triangle. Drill 3/8 inch holes through both pieces and secure with three carriage bolts, washers and nuts. Repeat this process on the other upright and back leg support, keeping in mind that the two back leg supports must be on the inside of the two sides of the bench.
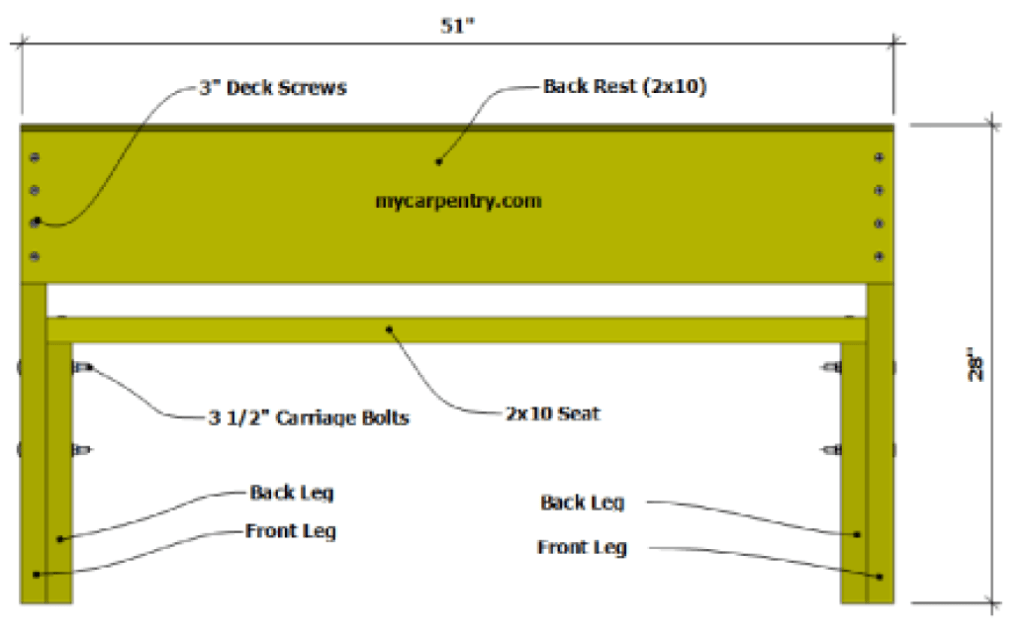
From the second 2×10, square off one end and cut it to make sure that the end is perfectly square. Measure 48 inches and cut it to length. This is the seat of the bench. From the remaining piece of 2×10, measure 51 inches and cut it square. This is the back rest of the bench. Secure the seat of the bench onto the top of the back leg supports on each side of the assembled uprights with four or five of the deck screws on each end of the bench. (see diagrams)
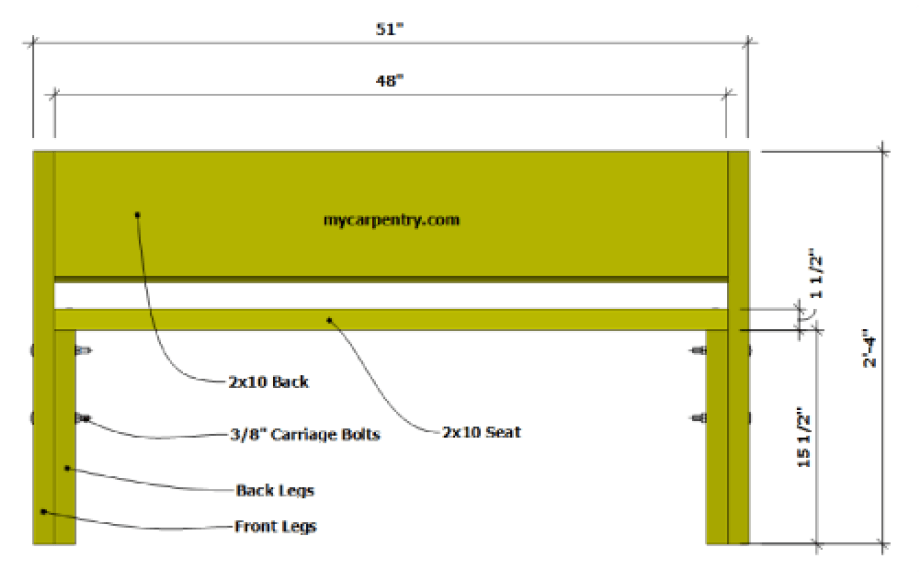
Using a square, make sure that the seat and uprights are square. Align the back rest to the top of the uprights and secure each side with the remaining deck screws. (See diagram below)

Leave a comment